The creamiest, tangiest Middle Eastern yogurt cheese you’ll ever make and it only takes 2 ingredients!
Can you call it a recipe if it only involves 2 ingredients? Yes. Yes, you can. And let me tell you, this is about to become your newest obsession just like it became mine.
Let me introduce you to labneh (sometimes spelled labaneh or labne)…a thick, creamy, tangy Middle Eastern yogurt cheese that’s basically Greek yogurt’s more sophisticated cousin. Think of it as the lovechild of Greek yogurt and cream cheese, but healthier, more flavorful, and ridiculously easy to make at home.
I first tried labneh at a local Middle Eastern restaurant, drizzled with olive oil and served with warm pita bread, and I was hooked. When I found out it was just strained yogurt with salt, I knew I had to try making it myself. And honestly? It’s become a staple in my fridge ever since.
This post contains affiliate links.
What Exactly Is Labneh?
If you’ve never heard of labneh before, don’t worry, you’re not alone! Labneh is a staple in Middle Eastern cuisine, particularly in Lebanon, Syria, Jordan, and Palestine. It’s essentially yogurt that’s been strained to remove the liquid whey, leaving behind a thick, spreadable cheese with a delightfully tangy flavor.
The texture is somewhere between Greek yogurt and cream cheese, thick enough to spread on toast, but still light and creamy. The taste? Tangy, slightly salty, and incredibly versatile. You can serve it sweet with honey and fruit, or savory with olive oil and herbs.
Why You’ll Love This Recipe
It’s super simple. Seriously, if I can make this while binge-watching my favorite shows, you can make it too. There’s barely any active work involved.
It’s incredibly versatile. Sweet or savory, breakfast or dinner, dip or spread. Labneh does it all. I’ve put it on everything from bagels to fruit crumbles, and it’s never disappointed.
It’s healthier than cream cheese. Labneh is packed with protein and probiotics (thanks to the yogurt base), and it has fewer calories and less fat than traditional cream cheese. Win-win!
It costs a fraction of store-bought. A container of labneh at the grocery store (if you can even find it) will run you $5-8. Making it at home? About $2-3 for the same amount.
It’s a great make-ahead option. Once you make it, it lasts in the fridge for up to two weeks. Perfect for meal prep Sundays!
Ingredients You’ll Need
Here’s the beautiful thing about this recipe, you probably already have everything you need:


Needed:
Greek Yogurt (1 container, 32 oz)

- I recommend using full-fat Greek yogurt for the creamiest, richest results
- You can use 2% or low-fat, but it won’t be quite as luxurious
- Make sure it’s plain, unsweetened yogurt (no vanilla or flavored varieties!)
- My go-to brands: Fage, Chobani, Stonyfield, or any store brand works great
Kosher Salt (a pinch, about ½ teaspoon)

(you definitely don’t need a container of salt that is this big!)
- Kosher salt works best because it dissolves easily
- The salt helps draw out moisture and adds flavor
- Sea salt works too if that’s what you have
Equipment You’ll Need…
- Cheesecloth (or a thin, clean kitchen towel)

- Strainer (fine mesh works best)
- Rubber band or kitchen twine (optional, for securing the cheesecloth)
Pro tip: You definitely don’t need a container of salt that is this big! (A small pinch will do.)
How to Make Labneh: Step-by-Step
Step 1: Mix the Yogurt and Salt
Pour your container of Greek yogurt into one of your bowls. Add your pinch of kosher salt (about ½ teaspoon). Give it a good stir until the salt is fully incorporated. That’s it for the active prep work!
Step 2: Set Up Your Straining Station
Place your strainer over the second bowl. Make sure there’s enough clearance between the bottom of the strainer and the bottom of the bowl. Uou don’t want your yogurt sitting in the liquid that drains out.
Line the strainer with your cheesecloth. I like to use a double layer to make sure nothing seeps through, but one layer works if your cheesecloth is thick enough.

Step 3: Pour and Cover
Pour the yogurt and salt mixture onto the cheesecloth in the strainer. Fold the edges of the cheesecloth over the top to cover the yogurt completely. This helps prevent it from drying out or picking up any fridge odors.
If you want to get fancy, you can gather the edges of the cheesecloth and tie them with kitchen twine, then hang the bundle from a wooden spoon suspended over a bowl. This traditional method uses gravity to help the whey drain. But honestly? The strainer method works just as well and is way less fussy.


Step 4: Refrigerate and Wait
Cover the whole setup loosely with plastic wrap or a clean kitchen towel, and pop it in the refrigerator. Now comes the hardest part: waiting.
Leave it to strain for 24 hours. I know, I know, waiting is the worst. But trust me, it’s worth it. The longer you let it strain, the thicker and tangier it becomes.
Timing guide:
- 12 hours: Thick like Greek yogurt (good for mixing into recipes)
- 24 hours: Perfect labneh consistency—thick, creamy, spreadable (my personal favorite!)
- 48 hours: Super thick, almost like soft cheese (great for rolling into balls)
Step 5: Check Your Labneh
After 24 hours, check on your labneh. You should see a good amount of clear liquid (whey) in the bottom bowl. This is totally normal! The yogurt in the strainer should be significantly thicker, almost like cream cheese.
Give it a taste test. If it’s as thick and tangy as you’d like, you’re done! If you want it thicker, let it strain for another few hours.
Step 6: Store and Enjoy
Transfer your finished labneh to an airtight container. At this point, you can enjoy it as is, or customize it with your favorite toppings and flavors (see serving suggestions below!).


That’s all folks! No seriously, that’s all there is to it!
What to Do with the Leftover Whey
Don’t throw out that liquid in the bowl! That’s whey, and it’s actually really nutritious and useful. Here are some ideas:
- Add it to smoothies for extra protein
- Use it in baking instead of milk or water (great in bread recipes!)
- Make pancakes or waffles with it
- Water your plants (they love the nutrients!)
- Use it as a base for soup like you would use broth
- Marinate chicken or fish in it for extra tenderness
How to Serve Labneh: Sweet & Savory Ideas
This is where labneh really shines. You can take it in so many different directions! Here are my favorite ways to enjoy it:
Sweet Serving Ideas
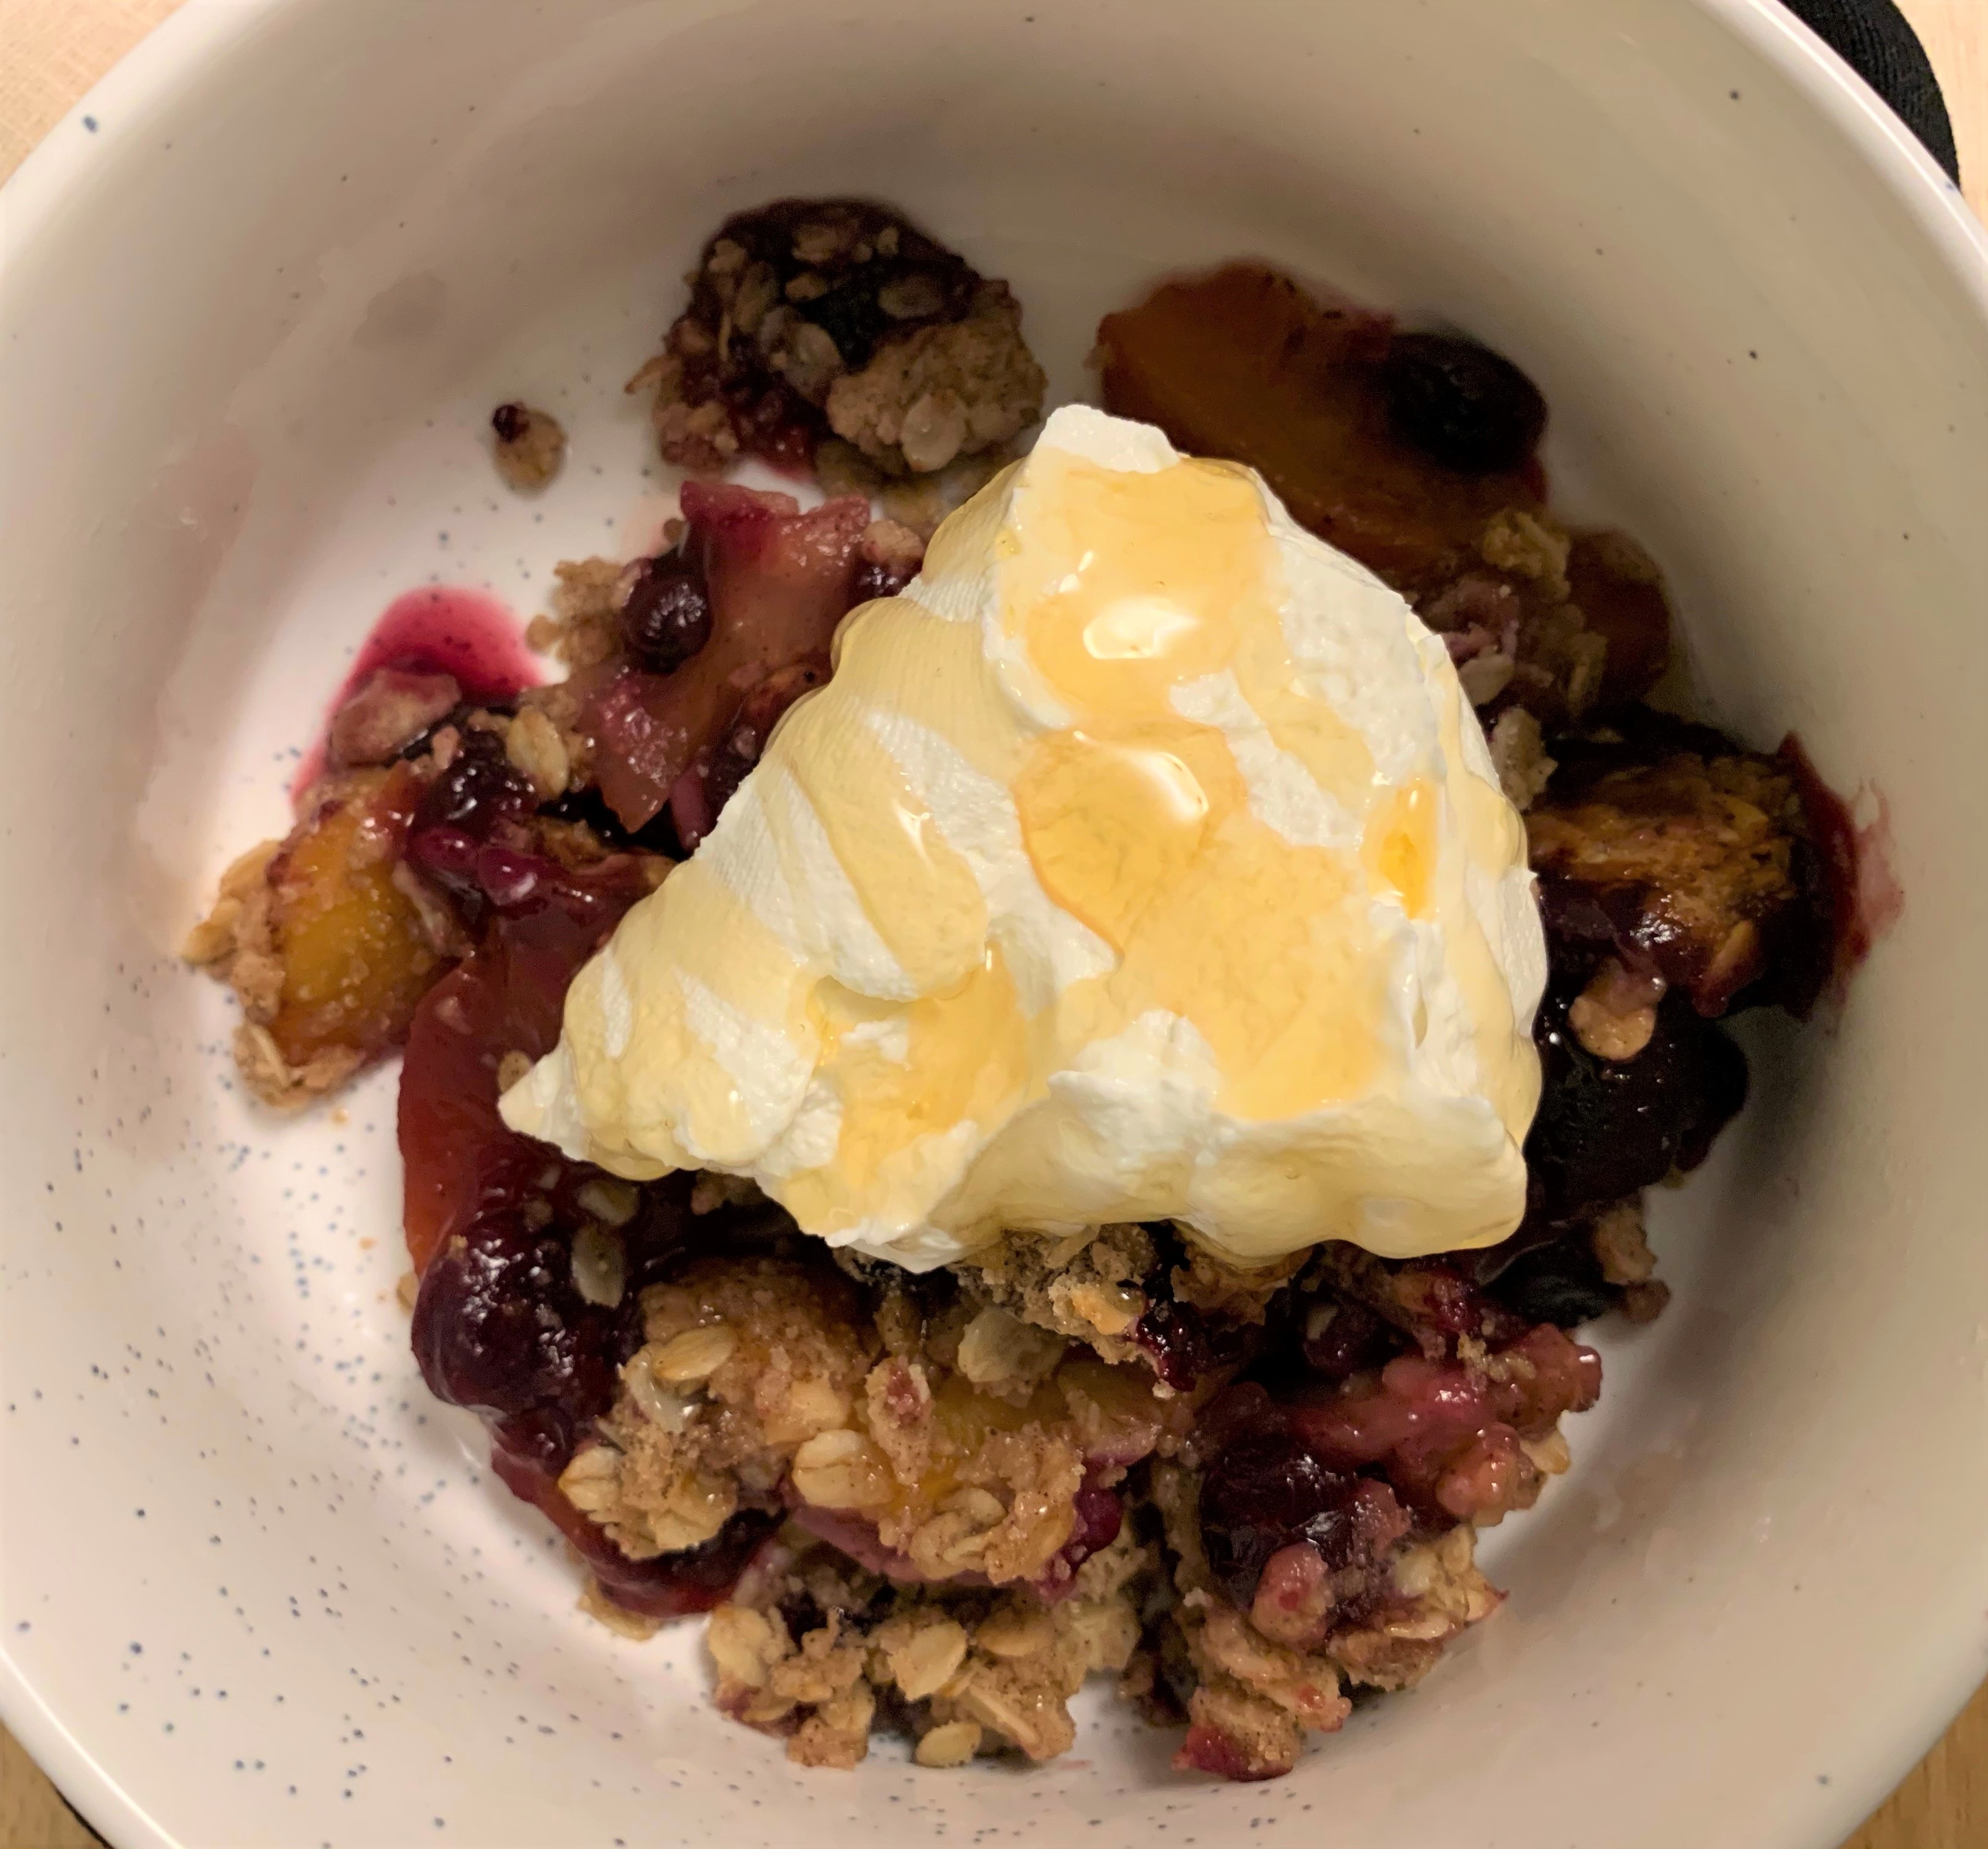
My Personal Favorite: Fruit Crumble with Honey This is how I eat it 90% of the time. I dollop labneh on top of fruit crumble (apple, berry, whatever’s in season), drizzle it with honey, and call it breakfast. It’s like a healthier version of whipped cream or ice cream. Woohoo! 10/10 in ease and taste!
Other Sweet Options:
- Breakfast Toast: Spread on whole grain toast, top with sliced strawberries and a drizzle of honey
- Bagel Spread: Use it like cream cheese on a toasted bagel with jam
- Smoothie Bowl Topper: Add a dollop on top of your morning smoothie bowl
- Pancake Topping: Replace syrup with labneh, fresh berries, and a drizzle of maple syrup
- Yogurt Parfait: Layer with granola and fresh fruit
- Dessert Dip: Mix with a little powdered sugar and vanilla, serve with graham crackers or fruit
- Overnight Oats: Stir into your overnight oats for extra creaminess
- Date Stuffing: Stuff pitted dates with sweetened labneh and top with chopped pistachios
Savory Serving Ideas
Classic: Spread labneh on a plate, make a well in the center, drizzle generously with good olive oil, sprinkle with za’atar (a Middle Eastern spice blend), and serve with warm pita bread. This is the traditional way, and it’s absolutely delicious.
Other Savory Options:
- Avocado Toast Upgrade: Spread labneh on toast first, then add smashed avocado
- Veggie Dip: Mix with lemon juice, garlic, and herbs. Serve with fresh cucumbers, tomatoes, and carrots
- Sandwich Spread: Use instead of mayo on your favorite sandwich
- Pasta Sauce Base: Thin with a little pasta water and toss with hot pasta, lemon zest, and fresh herbs
- Baked Potato Topping: Use instead of sour cream
- Eggs Benedict Base: Spread on English muffins before adding poached eggs
- Mezze Platter: Serve alongside hummus, baba ganoush, and olives
- Grain Bowl Addition: Add a dollop to your favorite grain bowl
- Taco Topping: Use instead of sour cream on tacos or burrito bowls
- Herb Mix: Blend with fresh dill, mint, or chives for an herbed spread
Pro tip: Room temperature labneh spreads easier than cold, so take it out of the fridge 15-20 minutes before serving.
Flavor Variations to Try
Once you’ve mastered the basic recipe, here are some fun variations:
Herbed Labneh: Stir in chopped fresh herbs (dill, mint, parsley, or chives) and a little garlic before serving
Za’atar Labneh: Mix in 1-2 tablespoons of za’atar spice blend
Lemon Herb Labneh: Add lemon zest, fresh dill, and black pepper
Garlic Labneh: Stir in minced garlic and olive oil
Spicy Labneh: Mix in red pepper flakes, cayenne, or harissa paste
Sweet Cinnamon Labneh: Add cinnamon, vanilla extract, and a touch of honey
Labneh Balls: After straining for 48 hours, roll the thick labneh into small balls, roll them in herbs or spices (za’atar, sumac, dried oregano), and store covered in olive oil in the fridge.
Storage Tips
How to Store: Keep your labneh in an airtight container in the refrigerator.
How Long It Lasts: Properly stored, homemade labneh will last for up to 2 weeks in the fridge. Always use a clean spoon when scooping it out to prevent contamination.
Can You Freeze It? Technically yes, but I don’t recommend it. The texture changes when frozen and thawed. It becomes a bit grainy. Better to just make smaller batches more frequently.
Best Container: I like to store mine in a glass jar with a tight-fitting lid. Mason jars work great!
Troubleshooting: Common Questions Answered
Q: Can I use regular yogurt instead of Greek yogurt? A: Yes, but it will take much longer to strain (36-48 hours instead of 24) because regular yogurt has more liquid. Greek yogurt is pre-strained, so it gives you a head start. If you do use regular yogurt, start with a larger amount since it will reduce more.
Q: Can I use non-dairy yogurt? A: I haven’t personally tested this, but from what I’ve read, coconut yogurt works best for non-dairy versions. Just make sure it’s a thick, Greek-style coconut yogurt. The results won’t be exactly the same as traditional labneh, but it should still be tasty!
Q: What if I don’t have cheesecloth? A: No problem! You can use:
- A clean, thin kitchen towel (not terry cloth. That would be too thick and the fibers could get mixed in)
- Paper coffee filters (might take longer but works for small batches!)
- A nut milk bag
- Several layers of paper towels (not ideal but in a pinch, it works)
Q: My labneh is too thin. What did I go wrong? A: It probably just needs more time! Put it back in the fridge to strain longer. Also check that:
- Your yogurt isn’t sitting in the whey (make sure there’s clearance in your bowl)
- Your cheesecloth isn’t too thick (water needs to be able to drain through)
- You didn’t use low-fat or non-fat yogurt (these have less solids to begin with)
Q: My labneh is too thick/dry. Help! A: You over-strained it! No worries. Just stir in a little of the reserved whey or some milk to thin it back out to your desired consistency. You can also mix in a little olive oil to make it creamier.
Q: Can I make this without salt? A: You can, but I don’t recommend it. The salt helps draw out moisture and really enhances the flavor. Without it, your labneh will be pretty bland. If you’re watching your sodium intake, you can reduce it to just a tiny pinch, but I wouldn’t skip it entirely.
Q: Is labneh the same as Greek yogurt? A: Not quite! Greek yogurt is strained yogurt, and labneh is Greek yogurt that’s been strained even MORE. Think of it as: regular yogurt → Greek yogurt → labneh. Each step removes more whey, making it thicker and tangier.
Q: How do I know when it’s done? A: After 24 hours, your labneh should be thick enough to spread with a knife without it running or dripping. It should hold its shape when scooped. If you’re not sure, taste it! It should be tangy and creamy.
Q: Is homemade labneh healthy? A: Yes! Labneh is high in protein, contains beneficial probiotics (from the yogurt), and is lower in lactose than regular yogurt (since much of it drains off with the whey). It’s also a good source of calcium. Plus, since you’re making it yourself, you control exactly what goes in, no preservatives or additives!
Q: Can I use flavored yogurt? A: No, stick with plain! Flavored yogurts have added sugars and flavorings that won’t work well in this recipe. You want plain, unsweetened yogurt so you can control the flavor yourself.
Why Make Your Own Instead of Buying It?
Cost: Store-bought labneh costs $5-8 for 8 ounces. Homemade costs about $3-4 for 16 ounces (depending on yogurt prices). You’re saving at least 50%!
Control: You know exactly what’s in it, just yogurt and salt. No preservatives, stabilizers, or weird additives.
Availability: Many grocery stores don’t carry labneh, or only have one expensive brand. Making your own means you always have it on hand.
Freshness: Homemade labneh tastes fresher and tangier than store-bought.
Customization: You can make it exactly as thick as you like, and flavor it however you want.
More Granny’s Recipe Box Recipes
This recipe is part of my “Granny’s Recipe Box” series where I share simple, time-tested recipes that focus on quality ingredients and minimal fuss. These are the kinds of recipes that get passed down through generations because they work.
Stay tuned for more recipes from Granny’s collection!
Recipe Card
Easy Homemade Labneh Recipe
Creamy, tangy Middle Eastern yogurt cheese made with just 2 ingredients!
Prep Time: 10 minutes
Inactive Time: 24 hours
Total Time: 24 hours 10 minutes
Servings: 6-8 servings (about 2 cups)
Cuisine: Middle Eastern
Course: Breakfast/Condiment/Dip
Diet: Vegetarian, Gluten-Free
Ingredients:
- 1 container (32 oz) full-fat plain Greek yogurt
- ½ teaspoon kosher salt
Equipment:
- Cheesecloth or thin kitchen towel
- Fine mesh strainer
- 2 large bowls
- Plastic wrap or clean kitchen towel
Instructions:
- Mix: In a large bowl, stir together the Greek yogurt and kosher salt until well combined.
- Set up strainer: Place a fine mesh strainer over a second large bowl, making sure there’s at least 2 inches of clearance at the bottom. Line the strainer with a double layer of cheesecloth.
- Strain: Pour the yogurt mixture into the cheesecloth-lined strainer. Fold the edges of the cheesecloth over the top to cover completely.
- Refrigerate: Cover the setup loosely with plastic wrap and refrigerate for 24 hours. The whey will drain into the bottom bowl, leaving thick, creamy labneh in the strainer.
- Check and store: After 24 hours, transfer the labneh to an airtight container. Save the whey for other uses if desired.
- Serve: Enjoy sweet with honey and fruit, or savory with olive oil and za’atar!
Notes:
- For thicker labneh, strain for 36-48 hours
- Use 2% Greek yogurt for a lighter version
- Don’t have cheesecloth? Use a thin, clean kitchen towel or coffee filters
- Leftover whey can be used in smoothies, baking, or as a marinade
Have you tried making labneh before? What’s your favorite way to serve it? Drop a comment below. I’d love to hear your creative serving ideas!
Pin this recipe for later so you’ll have it when you’re ready to try something new!


Leave a Reply